Tiêu đề đã khá đẩy đủ thông tin cho các bạn rồi,
Nếu bạn đã từng cấu hình cho thiết bị này, làm đủ mọi cách tăng TX, RX (TX viết tắt của transmitter là thiết bị truyền tín hiệu điều khiển. RX viết tắt receiver là thiết bị nhận tín hiểu điều khiển) mà âm thanh gọi ra vẫn nhỏ xíu, khách không thể nghe thấy gì.

Đây có thể nói là một lỗi của thiết bị, vì vậy sẽ không thể làm theo cách thông thường chỉnh sửa trên giao diện của thiết bị được. Bạn phải làm cao siêu hơn chút là SSH vào thiết bị và cấu hình lại 2 thông số này.
Chi tiết cấu hình như bên dưới, mình copy từ bên trang support của yeastar.
(chưa rõ ở đâu, bạn vui lòng để lại comment để mình support nhé):
Adjust volume via SSH access (For FXO)
Here are the detailed steps to adjust the volume via SSH access.
Step1. Enable SSH access in ‘LAN settings’ page.Then click “Apply Changes” to take effect.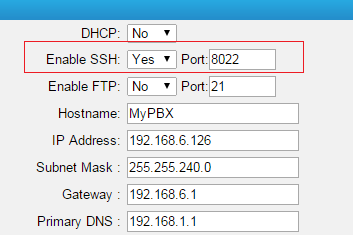
Step2. Download putty.exe and log in via ssh access.
Here is the download link for putty.exe:http://www.yeastar.com/download/tools/putty.exe
Open it, input MyPBX’s IP address and the SSH port,in this example, IP is 192.168.4.146, port : 8022.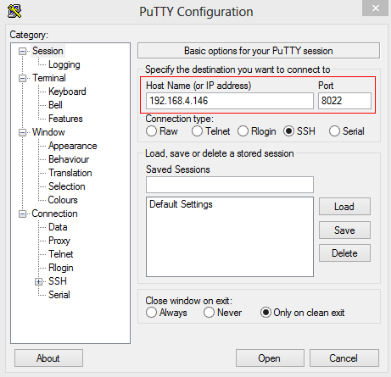
Step3. Click ‘Open’, input the default user name and password
User name: root
Password: ys123456
Step4. Check the FXO channel you want to modify
Input command: vi /etc/asterisk/users.conf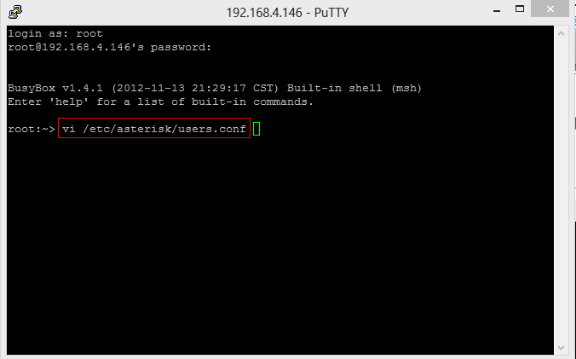
Step5. Please find the pstn trunk you want to modify, in this example, the trunk name is ‘pstn3’, which we can find on web too.
Find the details of this trunk, we can find both value of rxgain and txgain are 0.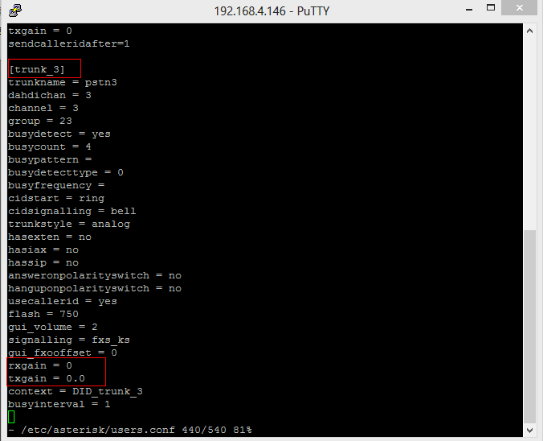
Step6. Create customized configuration file to save the value we want to set for rxgain and txgain.
The command is: vi /persistent/custom-cfg/users_custom.conf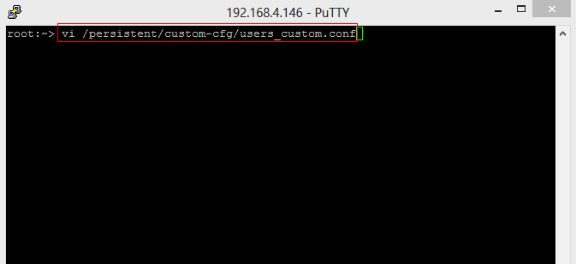
We need to input the contents including the value we want.
In this example, the value of txgain and rxgain of pstn 3 is 15.
So the content should be:
[trunk_3]
rxgain = 15
txgain = 15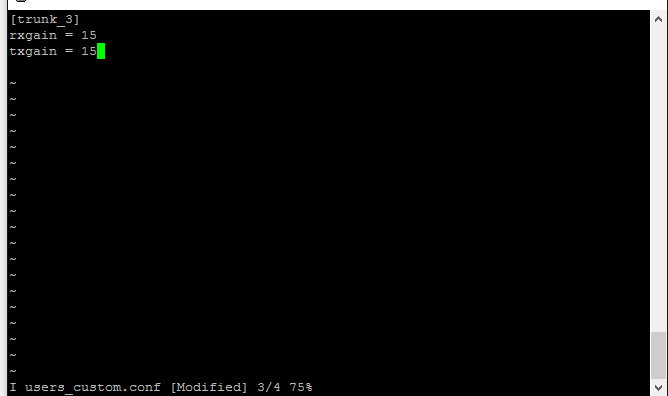
Note: the value should not be more than 15 for rxgain and txgain, or it will cause noisy signal.
Step7. After finishing typing, press “Esc” key to exit Insert Mode, then Type command “:wq” to save and quit. Then click ‘apply the changes’ on web to reload the modification before testing.
Vậy là ok rồi đó. Bạn thử rồi comment cho mình biết nha.
Nguồn bài viết tham khảo:
https://support.yeastar.com/hc/en-us/articles/217475717-How-to-Adjust-Volume-of-FXS-FXO-in-MyPBX